

- I haven't been using the BluRay drive that came in my now 4-months-old laptop (reviewed here).
- By chance I found topics in Asus User Forums speaking of HDD caddies, which replace the optical drive with a housing for a second hard drive.
- Knowing that the laptop has potential for performance improvement ( SATA 3, Core i7, etc. ), I decided it was about time to invest into SSD.
- The advice I got was to put the SSD in the place of the main 1 TB HDD and place the old HDD in the caddy. The reason: the caddy controller or a lower speed bus might cripple performance, which would kill SSD performance.
Components:
- The laptop, obviously, with the correct screw drives.
- Another PC/ tablet/ smartphone with internet connectivity to research or watch a video while on the job. This is ignorable if you do enough preparation and watch the videos on YouTube.
- HDD Caddy: mine is from HDDCaddy.eu. However you can get it cheaper from eBay. I went for the more expensive one because it mentions that it has SATA 3 support.
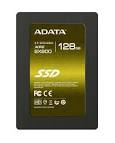
- ADATA XPG SX9 128 GB SSD. There are very few alternatives here in Cairo, this model had nice reviews during fall 2012, which makes it a good option. Uses a Sandforce controller if you care about that.
- External Storage for backing up data
How I did it - the fool-proof, brute force way:
- Backup everything on the original 1 TB to external storage.
- Remove the original storage, install SSD in its place.
- Install the original storage in the HDD caddy and put it in place.
- During Windows installation, I completely formatted the 1 TB HDD, to move boot settings to the SSD and be sure about it.
- Finish install Windows in 3 minutes; first noticeable performance gain
- Install Asus drivers, Firefox and the usual list of tools.
- Using the Storage Management tool available in Windows, I partitioned the HDD into 3 partitions: page file, media & executables.
2 tips during partitioning:
Results:
A general tip:
This is not specific to this upgrade, but during formatting the original 1 TB HDD that contained the recovery partition of Asus, the recovery partition was lost. I sort of lost access to the Windows copy that was pre-installed on the machine and I need to find a way to regain hold of it.
- Page file should be 1-1.5 times the amount of RAM you have.
- I still have the virus-phobia that would put me in a situation that would force me to format the partition that holds all the executables, so at least I would save my precious media, documents.
Results:
- Windows boots in less than 30 seconds from power off to Welcome screen. You barely see the Windows logo.
- Games placed on the SSD load way faster. So far I am very happy with the much faster processing of Civilization 5's turns.
- Firefox start up is seeing a very satisfying boost (2 add-ons installed plus Flash, Java, etc.)
- Excessive heat! An extra hot blast of heat comes out of the left side of the machine. This makes me think it's better to limit gaming sessions to 45-60 minutes at a time only until things cool down again. After all, this machine is not a premium desktop replacement.
- A welcome bi-product: a de-bloated system; all the pre-installed freeware that I barely find useful was removed, improving resource utilization. However there is a price for this if done the way I did it, as in the last section of this guide.
A general tip:
This is not specific to this upgrade, but during formatting the original 1 TB HDD that contained the recovery partition of Asus, the recovery partition was lost. I sort of lost access to the Windows copy that was pre-installed on the machine and I need to find a way to regain hold of it.
No comments:
Post a Comment